Linux 系统实现天垓 100 支持部署模型
最近在研究大模型训练,硬件环境为飞腾 5000C + 天垓 100 的国产服务器,操作系统是麒麟。由于系统封闭、很多依赖无法更新到最新,尤其在宿主机环境调试时被“折磨”了两天。最终通过使用天数官方提供的 Docker 容器,顺利完成部署。
本文记录整个过程,供后续复现和排查问题参考。
宿主机环境准备
1
2
3
| yum install python3-pip
pip3 --version
# 输出示例:pip 20.2.2 from /usr/lib/python3.7/site-packages/pip (python 3.7)
|
1
| pip3 install opencv-python -i https://pypi.tuna.tsinghua.edu.cn/simple
|
- 安装 opencv-contrib-python(带扩展模块)
1
| pip3 install opencv-contrib-python -i https://pypi.tuna.tsinghua.edu.cn/simple
|
1
2
| python3 -c "import cv2; print(cv2.__version__)"
# 示例输出:4.12.0
|
常见错误与解决方案
❌ 错误 1:pip 下载超时
1
| socket.timeout: The read operation timed out
|
✅ 解决:
❌ 错误 2:找不到 libGL.so.1
1
| libGL.so.1: cannot open shared object file: No such file or directory
|
✅ 解决:
1
| apt-get install -y libgl1-mesa-glx
|
❌ 错误 3:找不到合适版本的 numpy
1
| Could not find a version that satisfies the requirement numpy>=1.23.5
|
✅ 解决:
1
2
| # 降级安装指定版本
pip3 install numpy==1.23.5 -i https://pypi.tuna.tsinghua.edu.cn/simple
|
YOLOv5 安装与测试
由于宿主机依赖不全,直接运行 YOLOv5 报错,转而使用 Docker 容器部署,最终通过天数官方容器成功调用天垓 100 算力卡。
容器镜像地址:
👉 天数容器镜像:下载地址

本文选择的是buntu20.04-py3.10-arm64
📄 详细步骤参看本博客另一篇文章Linux系统-安装YOLOv5
快速部署流程
1
2
3
| wget https://repo.anaconda.com/miniconda/Miniconda3-latest-Linux-aarch64.sh
bash Miniconda3-latest-Linux-aarch64.sh
source ~/.bashrc
|
1
2
| git clone https://github.com/ultralytics/yolov5.git
cd yolov5
|
1
| pip3 install -r requirements.txt -i https://pypi.tuna.tsinghua.edu.cn/simple
|
1
| wget https://github.com/ultralytics/yolov5/releases/download/v7.0/yolov5s.pt
|
1
| python detect.py --weights yolov5s.pt --source ./zidane.jpg
|
安装天数 Docker 容器
下载 .run 安装器后放在宿主机目录下,执行:
1
2
3
| # 确认文件名称正确
chmod +x corex-docker-installer-ibuntu20.04-py3.10-arm64.run
./corex-docker-installer-ibuntu20.04-py3.10-arm64.run
|
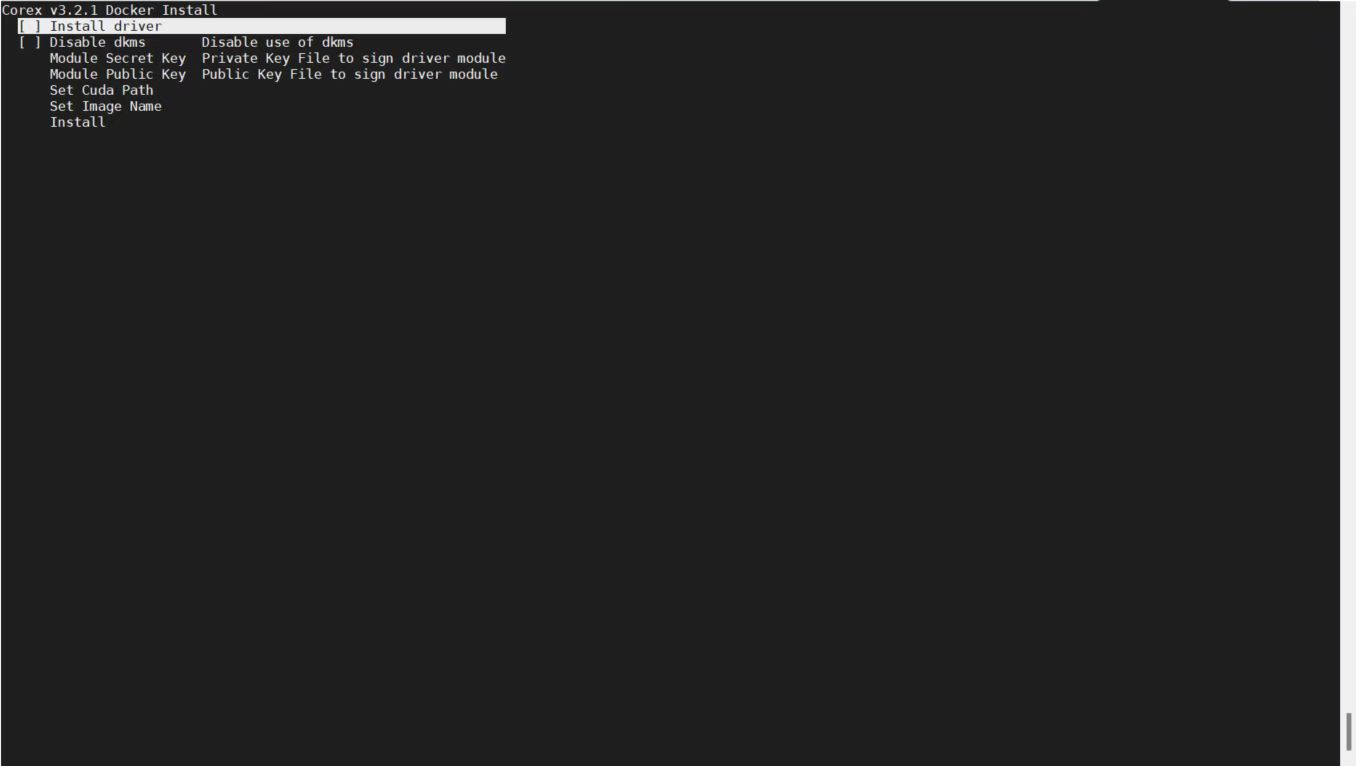
安装界面弹窗无需选择任何选项,直接继续安装。

⚠️ 如果报错提示 Docker 未启动:
1
2
| # 启动 Docker
systemctl start docker
|
1
| pip install scikit-learn joblib seaborn thop ipython gitpython
|
验证环境是否配置成功
1
2
3
4
5
6
7
8
9
10
11
12
13
14
15
16
17
18
| # OpenCV
python3 -c "import cv2 ;print(cv2.__version__)"
# 输出示例:4.6.0
# PyTorch
python3 -c "import torch ;print(torch.__version__)"
# 输出示例:2.1.0
# CUDA 是否可用
python3 -c "import torch ;print(torch.cuda.is_available())"
# 输出:True
# 查看 GPU 设备信息
python3 -c "import torch ;print(torch.cuda.device_count())"
# 输出:2
python3 -c "import torch ;print(torch.cuda.get_device_name(0))"
# 输出:Iluvatar BI-V100
|


